Table of Contents
ToggleA stuck window sash or rotted frame can turn a breezy afternoon into a source of frustration, and energy bills. Window sash replacement is one of the most rewarding DIY projects you can tackle to restore old windows or fix damaged ones without replacing the entire frame. Whether you’re dealing with a single stuck sash or planning to upgrade multiple windows, this guide walks you through the process, materials, and common pitfalls. The good news? Most homeowners can handle this project with basic hand tools and a bit of patience. Let’s get your windows working smoothly again.
Key Takeaways
- Window sash replacement is a cost-effective DIY project that restores stuck, rotted, or damaged sashes while preserving the original window frame and historic character of your home.
- Proper leveling with shims and a level is critical—rushing this step causes binding, sticking, and warping that will frustrate you for years.
- Seal all gaps between the new sash and frame with paintable exterior caulk before painting to prevent air leaks, moisture damage, and drafts.
- Accurate measurements at multiple points (top, middle, bottom) prevent sizing mistakes, especially in older homes where openings are often uneven.
- Professional help is necessary if jambs or sills are deeply rotted, for historic or double-glazed replacements, or for second-story windows where fall risk is significant.
- Pre-assembled window sash replacement kits with pre-installed hardware and pre-primed sashes save hours of work compared to solid wood alternatives that require ongoing maintenance.
What Is A Window Sash And Why Replace It
A window sash is the movable frame that holds the glass panes in a double-hung or single-hung window. It slides up and down (or side-to-side in casement windows) within the window frame, or jamb. The sash sits on a track and is usually held in place by counterweights, springs, or friction. Over time, sashes can become warped, cracked, or painted shut, making them difficult or impossible to open. Rot from moisture exposure is another common culprit, especially in older wood windows.
Replacing the sash, rather than the entire window, is cost-effective and preserves the character of historic homes. A window sash replacement kit or wood window sash replacement kit allows you to swap out just the movable parts while keeping the original frame intact. This approach avoids the mess of removing the entire window unit and dealing with wall damage or trim work. Whether you’re restoring a Victorian farmhouse or updating a 1980s ranch, understanding what you’re replacing helps you choose the right materials and approach.
Tools And Materials You’ll Need
Before you start, gather your tools and materials. You don’t need anything fancy, but having the right stuff prevents frustration and ensures a clean job.
Tools:
- Pry bar or flat-head screwdriver (for removing trim)
- Hammer
- Drill-driver or screwdriver set
- Utility knife
- Measuring tape
- Level (24″ is ideal)
- Paintbrush or roller
- Chisel (for scraping old glazing compound, if needed)
- Safety glasses, work gloves, and dust mask
Materials:
- Window replacement sash or wood window sash replacement kit (pre-cut, pre-primed sashes make the job faster)
- Shims (tapered wood pieces for leveling)
- 1¼” trim screws or galvanized nails
- Wood filler or spackling compound
- Exterior caulk (paintable, silicone-acrylic blend)
- Primer and exterior paint (if finishing raw wood)
- Drop cloth or plastic sheeting
Choose your sash material carefully: solid wood looks traditional but requires ongoing maintenance, while composite or fiberglass window replacement sash options resist rot and need less upkeep. Pre-assembled window sash replacement kits often come with hardware pre-installed, saving you hours of work. Where to buy window sash replacement kits? Home Depot, Lowe’s, specialty millwork suppliers, and online retailers like Amazon all stock options. For custom or period-correct replacements, check local sawmills or heritage window suppliers, they’ll match your existing sashes perfectly.
Step-By-Step Sash Replacement Instructions
Removing The Old Sash
Start by protecting your workspace. Lay down a drop cloth inside and outside the window opening to catch debris and paint chips (older windows may contain lead-based paint, so be cautious and seal dust with plastic sheeting if needed).
Secure the window frame with shims or weights to prevent it from moving. Using a utility knife, carefully cut through any paint sealing the sash to the frame, this makes removal easier and cleaner. Work slowly around all four edges of the sash.
Slide the sash up and down gently to free it. On older double-hung windows, you may need to remove the stop moldings (the trim pieces that keep the sash from falling out). Use a pry bar to gently lift these away, working from the center outward to avoid splitting. Mark the stops with tape so you know which way they go back.
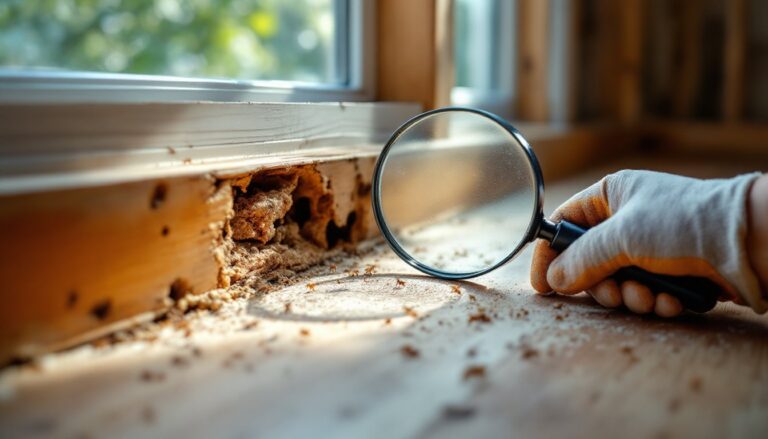
Once the stops are off, lift the sash out and set it aside. Check the jambs (sides) and sill (bottom) for rot, mold, or debris. Expert guides from This, so reference those if you’re working on a tricky historic window.
Installing The New Sash
Before installing, measure your opening from top to bottom and side to side. The new sash should be slightly smaller, typically ⅛” shorter and narrower than the opening to account for shimming and caulking. If buying a stock window sash replacement kit, verify dimensions match your opening.
Place the new sash into the opening, centered and level. Use shims behind the jambs to support it and keep it plumb (perfectly vertical). Slip shims in from the outside, working your way up from the sill. Check with a level after every shim, gaps or tilts mean binding and sticking later.
Once the sash is perfectly positioned, drive screws through the stops or directly into the sash (depending on your design). Use at least two fasteners per side. Reinstall the stop moldings, or if they’re damaged, cut and fit new ones. Seal all gaps between the sash and frame with paintable exterior caulk. Smooth it with a wet finger or caulk tool for a clean look.
Let caulk cure per manufacturer instructions (usually 24–48 hours) before painting. Apply primer and at least two coats of exterior paint, allowing proper drying time between coats. Family Handyman offers detailed woodworking and finishing tips that apply to sash painting and trim work.
Common Mistakes To Avoid
The most frequent mistake is rushing the leveling step. A sash that’s not plumb will bind, stick, and eventually warp. Take extra time with your level and shims, they’re cheap insurance against years of frustrating windows.
Skipping the gap seal is another culprit. Gaps around the sash let air and moisture in, defeating the purpose of the replacement. Caulk generously, especially where the sash meets the frame. It’s easier to scrape off excess than to chase drafts and leaks later.
Choosing the wrong sash size happens when people measure carelessly or forget to account for trim width. Measure multiple times: at the top, middle, and bottom of the opening. If measurements vary (common in older homes), split the difference and shimmed the sash to fit.
Not acclimating wood sashes is a costly oversight. If you buy solid wood window sash replacement units, let them sit in your home for a few days before installation so they adjust to local humidity. Wood moves, and sudden changes cause binding or gaps.
Painting before caulking is inefficient and looks sloppy. Always seal gaps first, then paint over the caulk. Conversely, don’t paint over shims, remove them once the sash is fastened and the caulk has dried. Excess paint or caulk trapped by shims prevents proper closure.
When To Call A Professional
Some situations demand professional help. If the jambs or sill are deeply rotted (soft to the touch, crumbling), the structural frame needs repair before a new sash will function properly. That’s a carpenter’s or contractor’s job, not a DIY afternoon.
Historic or double-glazed sashes may require custom manufacturing. If your home is on a historic register or requires period-correct restoration, source sashes from specialty mills. These often cost more but preserve authenticity and may be required by local codes.
If you’re uncomfortable working at heights or on a second-story window, hire someone. Fall risk is real, and mistakes from a ladder are expensive. A professional can complete the job safely in a few hours.
Multiple problem windows or structural issues (like frames that are completely out of square) are better left to experts. Bob Vila’s network of contractors can connect you with vetted professionals if you need help. The upfront cost beats a botched job that requires re-doing or full window replacement.