Table of Contents
ToggleYour bathroom vanity is more than a place to brush your teeth, it’s the anchor of your morning routine and a focal point that sets the tone for your entire bathroom. Whether you’re planning a full renovation or a simple upgrade, finding the right vanity style and configuration can dramatically improve both functionality and aesthetics. From floating modern designs to rustic farmhouse cabinets, vanity ideas for bathroom spaces have evolved far beyond standard builder-grade cabinetry. This guide walks you through contemporary styles, space-saving solutions, and material choices that work for real homes and real budgets. By the end, you’ll have concrete ideas for bathroom vanity cabinet ideas that fit your space and lifestyle.
Key Takeaways
- Floating bathroom vanity ideas offer modern aesthetics and improved floor cleaning by securing to wall studs with proper mounting brackets rated for 100+ pounds.
- Proper wall preparation and stud-location are critical for floating vanities; horizontal blocking between studs prevents dangerous pull-away issues over time.
- Rustic farmhouse vanities bring warmth by repurposing furniture like dressers, but require thorough waterproofing and multiple coats of moisture-rated finishes to withstand bathroom humidity.
- Small bathroom vanity solutions should incorporate wall-mounted designs, 24-inch widths, and vertical storage like recessed medicine cabinets to maximize tight spaces.
- Double-sink vanities require solid wood or braced plywood construction with careful plumbing planning, including proper drain sizing and code-compliant cleanout access.
- Material durability matters most in bathrooms: engineered quartz and solid-surface options offer low-maintenance alternatives to natural stone or wood, while proper hardware finishing prevents corrosion in steamy environments.
Modern Floating Vanities for Sleek, Contemporary Bathrooms
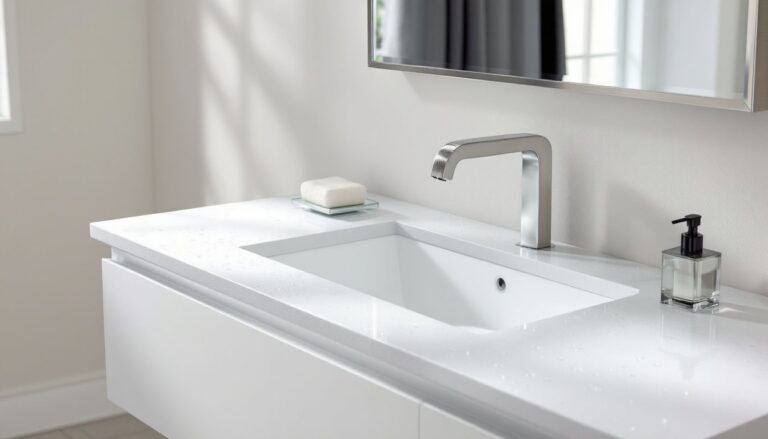
Floating vanities have dominated bathroom design for years, and for good reason: they create visual space and make cleaning the floor infinitely easier. Unlike traditional pedestal or cabinet-base designs, a floating vanity is anchored directly to the wall using heavy-duty mounting brackets, usually rated for 100+ pounds depending on the fixture.
The key to a successful floating installation is proper wall preparation. You’ll need to locate and secure the vanity frame to studs, typically 16 inches on center in residential framing. If your studs don’t align with your desired vanity width, you’ll need to install horizontal blocking (also called bracing) between studs to anchor your bracket hardware. This is not optional: a vanity pulling away from drywall mid-shower is both dangerous and expensive to repair.
Modern floating vanities typically measure 24 to 60 inches wide and sit about 18 inches off the finished floor. The open space below creates an airy, contemporary feel while providing storage flexibility, you can stash a step stool, baskets, or keep it minimal for an ultra-clean aesthetic. When selecting dimensions, measure your sink basin first. Most vessel sinks require at least 4 inches of countertop overhang on each side, and you’ll want at least 2 feet of clear space from your toilet if they’re nearby.
Material options for modern vanities lean toward engineered wood, lacquered plywood, or solid wood with a waterproof finish. Avoid particleboard or MDF in bathrooms: moisture will destroy them within a few years. High-gloss finishes photograph beautifully but show water spots and fingerprints constantly. Matte finishes are far more practical for daily living.
Rustic and Farmhouse Vanity Styles for Warm Charm
Rustic and farmhouse vanities bring intentionality and character to a bathroom. These typically feature reclaimed or distressed wood, oil-rubbed bronze hardware, and an emphasis on visible craftsmanship, think shaker-style cabinetry or chunky wooden legs rather than sleek minimalism.
A common DIY approach is repurposing an old dresser or kitchen cabinet as a bathroom vanity. This requires careful planning: you’ll need to reinforce the base for water resistance (seal all wood surfaces and consider a waterproof backing), create or enlarge an opening for your sink and drain lines, and ensure the structure can handle daily moisture. A single-sink dresser vanity typically works best for 30- to 36-inch widths, anything larger and you’re fighting structural limitations and plumbing complexity.
When building a custom farmhouse vanity from scratch, solid wood (pine, oak, or barn wood) provides authentic character. Expect to invest in proper finishing: primer, two coats of bathroom-grade paint or stain, and a polyurethane topcoat rated for moisture exposure. This isn’t a one-weekend project, but the payoff is a piece tailored exactly to your dimensions and design vision.
Pairing a rustic vanity with a vessel sink (a bowl-style sink that sits atop the counter) amplifies the farmhouse effect. Vessel sinks require taller faucets with longer reach and create a striking visual statement. Just remember: they splash more than undermount sinks, and they show water spots more readily. You’ll be wiping that counter down regularly.
Small Bathroom Vanity Solutions That Maximize Space
Small bathrooms demand strategy. A standard 30-inch vanity works in tight spaces, but you’ll want to pair it with thoughtful design choices to avoid cramped, cluttered feeling.
Wall-mounted vanities (not necessarily floating, just secured to the wall) are essential in small bathrooms. They lift the visual floor line and create the illusion of more floor space. A 24-inch-wide vanity is surprisingly functional for a powder room or guest bath, choose a single, centered faucet rather than a wide spread to save counterspace.
Vertical storage is your friend in tight quarters. Narrow shelving above the vanity (or a medicine cabinet recessed into the wall between studs) provides storage without encroaching on floor space. A recessed cabinet requires removing drywall and sheathing between studs, then installing a cabinet frame flush with the finished wall surface. This is straightforward carpentry but involves cutting into your wall, so understand your plumbing and electrical layout first, you don’t want to bore through a supply line.
Another practical option: corner vanities. A 24- or 30-inch corner unit makes use of awkward corner space that’s often wasted. These are less common in retail showrooms but absolutely worth specifying custom if your layout allows. Pair it with a corner faucet or a offset faucet positioned toward the basin, and you’ve recovered usable area.
Double Sink Vanities for Shared Bathrooms
Double-sink vanities solve the morning traffic jam in households with multiple people sharing one bathroom. Standard double vanities run 60 inches wide, though 72 inches gives each sink its own dedicated counterspace and reduces the “who touched my toothbrush” moments.
Material durability becomes even more important with two sinks. The vanity bears more weight, endures more daily use, and needs rock-solid construction. Solid wood or plywood with proper bracing (internal structure, not just cosmetic) prevents sagging over time. A center divider (called a mullion) between sinks adds structural support and visual organization. You’ll typically find it about 4 inches wide, constructed from the same material as the cabinet frame.
Plumbing a double vanity requires either a wider drain line (4-inch trap arm from the wall, rather than the typical 1.5-inch) or running two separate trap arms to your main stack. This isn’t a hardship if your walls allow it, but it’s worth discussing with a plumber before committing to dimensions. Some building codes require a cleanout access somewhere on the drain run, this is non-negotiable if you want to clear a clog without removing cabinetry.
Countertop seams are another practical consideration. A 60-inch vanity might ship as one seamless piece, but a 72-inch vanity often requires a seam joint midway. If using stone (marble, granite, or quartz), that seam must be professionally finished and sealed. Butcher-block or wood countertops need similar care, though the seam is typically less visible if you match grain and finish carefully.
Vanity Materials and Finishes to Consider
Wood, Marble, and Alternative Materials
Material choices define both the longevity and aesthetics of your vanity. The four primary categories, wood, stone, engineered surfaces, and ceramics, each bring different strengths and trade-offs.
Solid wood (oak, maple, walnut) offers warmth and character but requires meticulous sealing and maintenance in a moisture-rich environment. Finish it with a water-resistant polyurethane or conversion varnish, not standard interior paint. Budget $50–$150 per gallon for bathroom-grade finishes, and expect multiple coats for durability. Solid wood also expands and contracts with humidity, so allow 2–3 weeks of acclimation in your bathroom before final installation. Design platforms like Houzz showcase thousands of finished wood vanity examples that can guide your vision.
Marble and natural stone are premium choices that demand respect. Marble is porous and stains easily from acidic products (vinegar, citrus, most cleaners). Granite and limestone are harder but still vulnerable. Seal any natural stone vanity countertop quarterly with a penetrating sealer rated for bathrooms. The upside: they’re irreplaceably beautiful and improve with age. The downside: expect $100+ per linear foot for installation, plus sealing costs.
Engineered surfaces (quartz, solid-surface materials like Corian) offer non-porous durability and low maintenance. Quartz is harder than granite, resists staining, and never needs sealing. Solid-surface materials can be repaired if scratched or damaged, a professional can sand and refinish a blemish seamlessly. These run $60–$100 per linear foot installed, offering good middle ground between wood and natural stone.
Research design inspiration on platforms like Remodelista for curated bathroom vanity ideas spanning multiple materials and styles. Whatever material you choose, budget 2–3 inches of overhang beyond your cabinet base for both aesthetics and to protect the cabinet from direct water splash.
Paint, hardware, and finish details round out your vanity story. Matte or satin paint hides dust and water spots better than gloss. Oil-rubbed bronze, brushed nickel, and matte black are current favorites that hide fingerprints and water marks better than polished chrome. Invest in solid brass or stainless steel hardware, cheap plating chips and corrosion happens within months in a steamy bathroom. For further inspiration on bathroom vanity cabinet ideas and overall remodel planning, Homify offers thousands of real-world bathroom photos organized by style and size.
Conclusion
The right bathroom vanity is a blend of style, size, material, and honest self-assessment about how much time you want to spend maintaining it. Whether you’re drawn to sleek modern floating designs, rustic charm, or space-smart double sinks, start by measuring your exact space, understanding your plumbing layout, and committing to finishing materials that’ll survive daily moisture exposure. Build in time for wall prep and mounting hardware, a vanity is only as good as what holds it up. With thoughtful choices, your vanity becomes the centerpiece of a functional, beautiful bathroom you’ll enjoy for years to come.